ESLife

Tips on Self Defense with Stun Guns
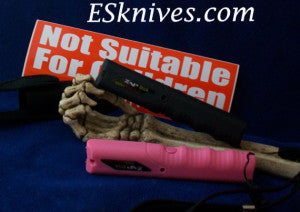
Self Defense Stun Gun

Self defense is an issue for each and every one of us. We want to have the freedom to go where we want and when we want. We want to feel safe. Second Amendment rights are a hot topic issue in our country. Statistics tell us that most women who carry a handgun are killed with their own handgun when attacked. Not everyone wants or needs to carry a firearm. Most of us want to protect ourselves and our families but many people would have a hard time using a handgun but we still want to feel safe and protect ourselves if needed.

We have many self defense items from blades, batons, kubatons, knuckle belt buckles and stun guns. Stun Guns for defense have become very popular in the last few years. They have become the self defense weapon of choice for many women. On the plus side you will rarely get charged with a crime using a stun gun.

The only self defense tool that sells better than stun guns is pepper gas. I think the fact that this may be because pepper gas tends to be less expensive than a stun gun. But don't be fooled. Stun guns are very effective self defense tools.

Stun guns are small and easily concealed. And are less intimidating by openly carrying a weapon. Stun Guns are easy to use. They require no special training. All you need to do is turn the safety off and press the trigger switch which then shoots a jolt of high voltage electricity to the attacker.

Stun guns are safe. Much safer than firearms. Stun guns are much more humane than firearms. Stun guns come with high voltage and low wattage. It is high wattage that kills people. The high voltage of a stun gun incapacitate your assailant without killing or permanent harm. There are no long lasting effects. After a few minutes they attacker will return to normal.

You can't hurt yourself using a stun gun. There are built in safeties to prevent shocking yourself when using a stun gun on your attacker.

Volts and Watts. The more volts the more powerful the stun gun. Volts are scaled to price. Starting at 100,000 volts. A 100,000 volts gun will incapacitate most people. A gun with 4 million volts will stop the worst of attackers dead in their tracks.

There are several types of stun guns. There are the standard hand devices. These are usually rectangular in shape and fit in your hand. You can carry these devices easily in your hand without intimidating others. Stun Batons are usually circular and longer giving you a longer reach but they are much harder to conceal. Many stung guns come also with flashlights. Then there are look alike stung guns. These are stung guns that look like other devices, like a cell phone, lipstick or a cane but are actually stun guns. These types are the easiest to conceal.

Most stun guns fit easily in your purse or pocket. Most stun guns come with a pouch that will have a loop or clip and can be carried on your side.

If you are attacked the best defense places to use your stun gun on are the neck, shoulders, abdomen, or groin. A half second to one second application causes pain. One or two seconds of the stun gun causes muscle spasms and confusion. Three to five second blasts causes the loss of balance and muscle control, disorientation and confusion. You can not get shocked by the stun gun even if your assailant is touching you. The gun will go easily through 1/2" of clothing.

Stun guns are easy to take care of. Keep them clean with a cloth. Most people like to turn on their stun guns and press the trigger to hear them make a loud electrical popping sound. This is a no no. Don't randomly pop the stun gun. They sound cool and to may impress you friend but ultimately this causes damage to your stun gun. Stun Guns were meant to complete a circuit when used on an attacker. Randomly popping your stun gun will eventually break the gun beyond repair.

Posted by ES Team on 10 December, 2014 how-to, self defense | 0 comments | Read more →

How to Sharpen a Knife

Most people stray away from sharpening a knife because they believe that it is a difficult task. They are probably right. Sharpening a knife is not an easy task. Stainless steel is a hard steel. People like it because stainless is rust resistant. Carbon steel is not as hard but holds an edge longer than stainless and performs better than stainless.

Before I start, there are dozens of different ways to sharpen a knife. Everyone has a way they think is best, and have all sorts of techniques and tools that they feel are essential in getting a sharp blade. In the end, much of it comes down to personal preference. In this article I present a couple easy, practical ways. With practice you to will develop your own style.

You want to keep your knives sharp. Two things. If a knife looses it's edge you have a much bigger job than just sharpening your knife. The second thing a dull blade proves to be more dangerous than a sharp blade. The chances of accidents are much greater with a dull blades. The message: Keep your blades sharp.

When you get started you will want a rough stock sharpener , the best is diamond, and a finishing sharpener like a Arkansas stone or a ceramic abrasive. These materials are harder than the steel and will cut away the steel on the surface of the blade easily.

When using your knife to cut if it turns to the right or to the left you know that it is time sharpen.

how to sharpen knife ceramic sharpener

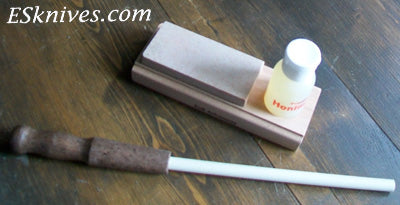
Ceramic and stone/oil

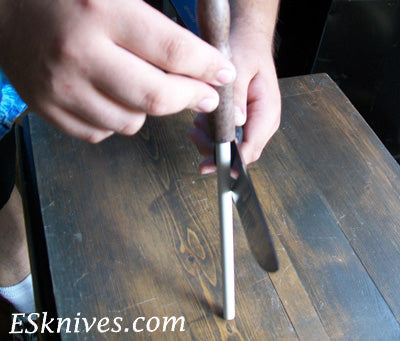
If you are using a steel or ceramic place your knife blade against the tip at a 20 degree angle. Pull the knife down and across the steel with a slight arc. Take the other side of the blade and repeat this action on the back of the steel . Repeat 10 times or until the blades sharpness is sharp.

The important things to remember is keep your 20 degree angle and run the full length of the steel with the full length of the knife. You will see guys do this very quickly. That comes with practice. Speed movement plays no part at all. Slow or fast, you get the same results. With a little practice you will get the hang of it. Don't give up. You will get it.


how to sharpen knife blade angle

Blade angle

If the steel does not work you will need to re-align the blade. The edge has dulled from constant using. Now you will need a stone. When using a stone, get a fine medium and coarse stone. You can find stones that have all three grades. A little honing oil will help. If you don't have honing oil a 3 in 1 type oil works in a pinch.

The angle you use on a stones determines that sharpness of the edge. The smaller the angle means the sharper the edge. The shaper the edge the faster a blade needs to be re-sharpened.

Place a little oil on your stone. Pick you angle. Here is the hard part: keeping the angle for 30 to 40 strokes before the new edge is formed. Do this with both sides of your blade. Start with your coarse stone and end with your fine stone. With a little practice you will be pleased with your edge. Don't stroke towards your self, Stroke away and you will never get cut.

If you find this procedure to difficult you may want to try sharpening with a knife sharpening system like a Lansky system. A good knife sharpening system comes with several stones and steels to sharpen. There will be some type of clamping system that will hold the knife at the same angle at all times. This makes sharpening your knife fool proof. Of course the systems are much more expensive than a steel or a stone but they give you a perfect edge.

Lansky

You can learn to sharpen serrations with a steel. My experience has been a chainsaw sharpener works best. A proper angle for a serrated blade is 20 to 25 degrees.

Posted by ES Team on 09 December, 2014 how-to | 0 comments | Read more →

Getting the Tents Ready

Labor Day Weekend is the time. This is the time my Son and I have planned our next backpacking adventure. We are going to the mountains!

The key to a successful backpacking trip is proper planning and good equipment. Today we went through our equipment, decided what we have and what we need. Today we started our lists.

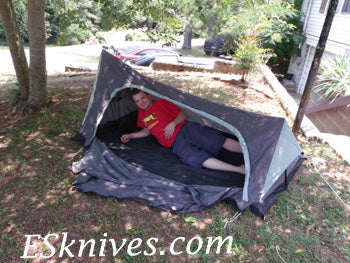
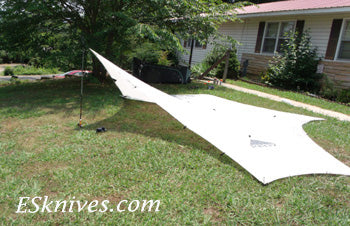
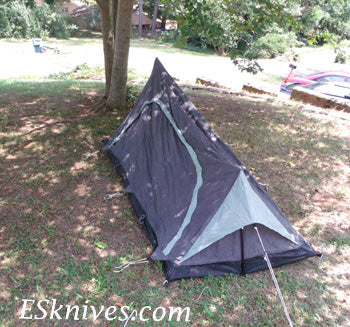
Shelter is a high priority when you are out in the wilderness. We are ultra light backpackers and we attempt to shave off ounces whenever possible. I have been able to get my winter pack, with 5 days of food, down to around 38 pounds. Light weight yet effective shelter is a must. Our goal is less than 2-1/2 pounds. My Son has a bivy tent and I take a kelty tarp. His tent is off market, but a nice tent none the less. With poles and stakes it weighs around 2-1/2lbs. My Kelty tarp is the large tarp. I like the large tarp because it can be used as a gathering place and is nice to sleep under. In a major storm I can roll up in it with my sleeping bag and stay warm and dry. My Kelty Tarp weighs in at around 2 pounds with stakes. I use my walking stick as a pole.

Backpacking Tent  Backpacking Kelty Tarp

Backpacking Bivy tent

 We have not been backpacking in a couple years so today we decided to prepare the tents for our trip. Preparing a tent for a trip means seam sealing and waterproofing.

There are many ways and many products to complete the waterproofing process. I am going to share how I waterproof a shelter.

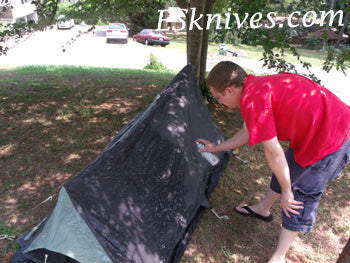
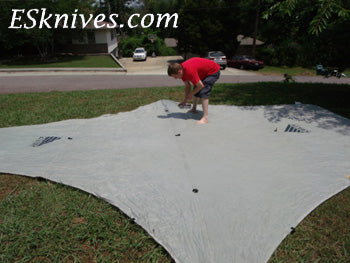
We set up our shelters to make sure that we had all the parts. Once the tent is set up it is time to silicone. Spray silicone or spray waterproofing, is inexpensive and works well. When spraying silicone on your shelter you spray it like you were spraying spray paint trying to get a good coat but not to thick. Be sure to focus on the seams. During a warm afternoon it takes around about to dry fully. Your tent is now waterproofed.  

 Waterproofing Tent     Waterproofing Kelty Tarp

Waterproofing is not enough. If you are going to have a leak on the trail it will probably be through a seam. Seam sealing is the next step. There are lots of seam sealers out there. Some are rather pricey. I use an inexpensive sealer that can be bought in any camping section at K-Mart, Wallmart or Target. I have had good luck with the lower end seam seal.

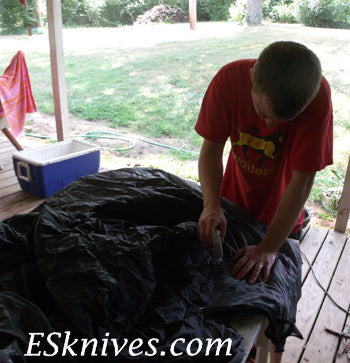
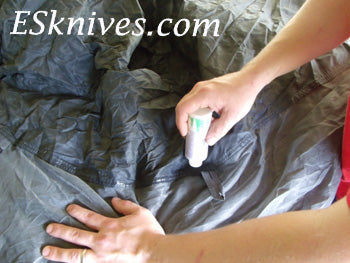
Turn your tent inside out and apply the sealer per directions. It is not hard to do. A hard flat surface is necessary to apply the sealer to the seam. The key to seam sealing is being slow and steady. Take your time and get the sealer into all the seams. Let your tent dry over night and put in it's sack.


Seam sealing a tent     Seam sealing tent for backpacking

Your shelter is now ready to go. This process should last one or two seasons with no leak problems.

I will continue to make updates on the upcoming backpacking trip.

Posted by ES Team on 08 December, 2014 camping, ES family, hobbies, how-to | 1 comment | Read more →

Country Ribs Italiano Recipe

Easy Country Ribs Italiano Recipe

Country ribs are an odd cut of meat. First of all they are not ribs. I believe the cut is called a rib as a selling point. They are cut from the sirloin or the rib end of the pork loin. Think about it… Who wants to buy cut up loin. Country ribs sounds much nicer and tastier.

Old Meat Men call these ribs, Jack Ribs. They come in in a few different cuts. I prefer the western cut because it includes a little bone. I like the bone. I think it adds flavor to the final product.

I usually cook Jack ribs on the grill that includes an aluminum pan, my favorite barbeque sauce and some good smoke flavoring. Today I was working at home and busy. So I thought I would get the crockpot out and make what I like to call Country Ribs Italiano. This recipe is easy and tasty.

The basic recipe is as follows

  • 1 Package of pork ribs around 3 to 4lbs
  • 2 cans of 14-1/2 oz cans of Italian diced tomatoes
  • 1 cup of frozen pearl onions
  • 1-1/2 tsp Italian Seasoning.
  • A little salt to taste 


Brown your ribs and put in the crockpot. Mix the rest of the ingredients and pour on top. Cook in the crockpot 8 to 10 hours.

This was the recipe I was taught. Now here is how I cooked it and put it together.

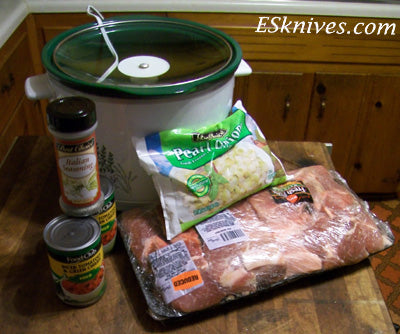
The picture above has everything I used except I added some chopped garlic (a couple cloves). I had some diced tomatoes with green chilies so I substituted them for the Italian tomatoes. I try to use what I have in the cabinet. As you can see in the picture I used ribs that were on sale. I look for bargains.

Here are the country ribs browning in the black iron skillet. You can't beat cast iron.

After the ribs have browned I put them in the crockpot. I mixed the rest of the ingredients together including the garlic . Then I poured it on top of the ribs.

What it looked like Before Cooking.

Finished product. Falling of the bone goodness.

I cooked it on low for around 9 hours.I served these ribs with mashed potatoes and green beans

Posted by ES Team on 07 December, 2014 how-to, recipes | 0 comments | Read more →

Backpacking Trip Update 2012

My son and I are planning a backpack trip this Labor Day Weekend. I am planning more updates as the trip grows nearer.

We have decided to go up to the Chattahoochee National Forest which is located in Georgia, North Carolina, and Tennessee. I am familiar with much of the Georgia side of the National Forest. I have backpacked many times in Georgia. We are thinking mainly about the Benton Mackaye Trail or maybe some off trails.

We used to do the AT (Appalachian Trail) but over the years the AT has become somewhat of a backpacker super highway. I go out in the wilderness to get away, especially from our modern society and the people. I like to be alone, in this case alone with my son and my thoughts. I don't want to drive hundreds of miles to get away and find myself stuck around several backpackers. A few years ago we were hiking the AT in November and we camped a mile away from a shelter and there were probably around 20 people camped out at the shelter. A mile away we could still hear them most of the night.

Well any way I have ordered maps for the North Carolina part of the National Forest and maps for the Benton Mackaye Trail. An interesting side note is that Benton Mackaye was the driving force behind the AT becoming a National Trail.

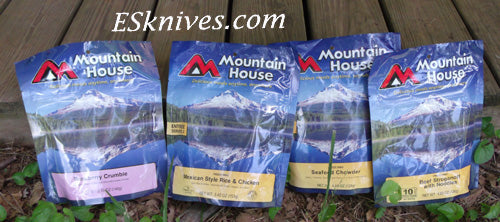
Mountain House Freeze Dried GrubWhen I go out I usually put together my own food. But this year I found some Mountain House Freeze Dried Grub at a discounted price. This year I thought I would try some prepackaged food. I will still put some food together. I will make some jerky, a spicy Gorp and a Sweet Gorp (Gorp = Good Ole Raisins and Peanuts). Most seasoned backpackers have their own favorite Gorp mixes. Gorp and Jerky is great for snacks and lunch when you are on the trail. I will bring my standard block of cheese wrapped in cloth. Cheese has a little weight to it but it is a nice addition and as long as it is not to hot will last a long time on the trail. On the first night I like to indulge by taking a steak I have frozen and a potatoes. By the time I am ready to eat the first night the steak is thawed and I have a steak and fried potatoes. That is a welcomed meal and since it is the first night the added weight is well worth the meal.

What I will make for sure are my morning drinks. I don't drink coffee much so that is not a problem on the trail. What I do like on the trail in the morning is chocolate carnation instant breakfast. I get myself a ziplock bag and add my instant breakfast and a some powdered milk. When I am ready to drink I heat up water and add it to my mix (in a cup, not the ziplock bag). The added powdered milk adds to the consistency.

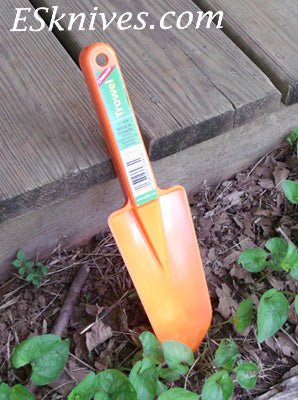
Coghlans TrowelI bought myself a new trowel for the trip. My old one had a crack in it. My last trowel had seen one to many backpacking trips and developed a crack. Going to the bathroom is tricky in the woods and you don't want your trowel to snap when you need it. I like this trowel from Coghlans. Most of their camping supplies are to much for the trail but they make a great trowel. It is light weight, strong, easy to see in the dark and the price is right. If you are wondering what you need a trowel for I would recommend the book How to Sh*t in the Woods: Environmentally Sound Approach to a Lost Art by Kathleen Meyer. This book has everything you will need to have a pleasant, yet environmentally friendly bathroom experience in the woods.

I like to take my trowel and wrap the handle with a good amount of Duck Tape. It proves to be a nice handle and you never know when you will need Duck Tape on the trail. Duck tape is an indispensable tool on the trail. Duck Tape makes a nice trowel handle and the bright orange trowel it is easy to see in the dark making your duck tape easily accessible. That orange trowel kinda sticks out.


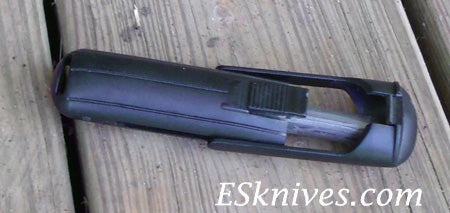
Blastmatch Ultimate Survival fire starter

When I go out on the trail I always take a lighter. Lighters are great for toilet paper (see previous paragraph). I like to know that I can light my stove or have a small fire in the rain. But I also like to know I can survive in the woods. So I usually bring a fire starter and tinder to create my own fire when I am on the trail. This year I decided on a blastmatch byUltimate Survival. The blastmatch works great for a guy with one arm. And since I have one arm I can use the blastmatch with one hand where as most fire starters you need two hands. They can be tricky. I can usually figure out a way to use them but the one handed method is much easier and I don't swear as much. As far as tinder goes I usually just usecotton balls that I keep in a ziplock. (ziplocks are a great way to keep things dry and weight little.) Bringing cotton balls means that I don't have to scrape bark of a tree or tear up a cat tail. I like to leave the wilderness as I found it and create as little damage as possible. 


 Thats all I got for now. More updates in the future.

Posted by ES Team on 06 December, 2014 ES family, hobbies | 0 comments | Read more →

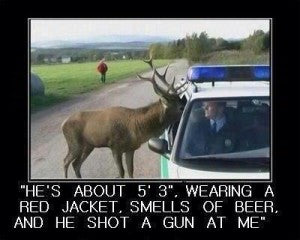
Deer hunting humor: he shot at me

He's about 5'3", wearing a red jacket, smells of beer and he shot a gun at me.

Deer Hunting Humor

Posted by ES Team on 05 December, 2014 humor, hunting | 0 comments | Read more →

Beautiful Superhero's- How do you date a superhero?

Movies

Take us out of our current reality - at least for an hour or two. Give us a chance to be SUPER, to SAVE the cheerleader, to FIGHT the bad guys, to LAUGH...

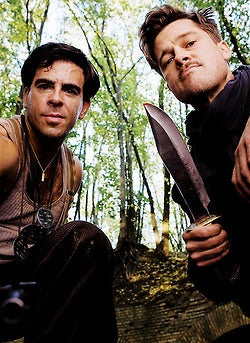
And maybe most importantly to check out really amazing knives!

Inglorious Bastards Brad Pitt Knife Picture

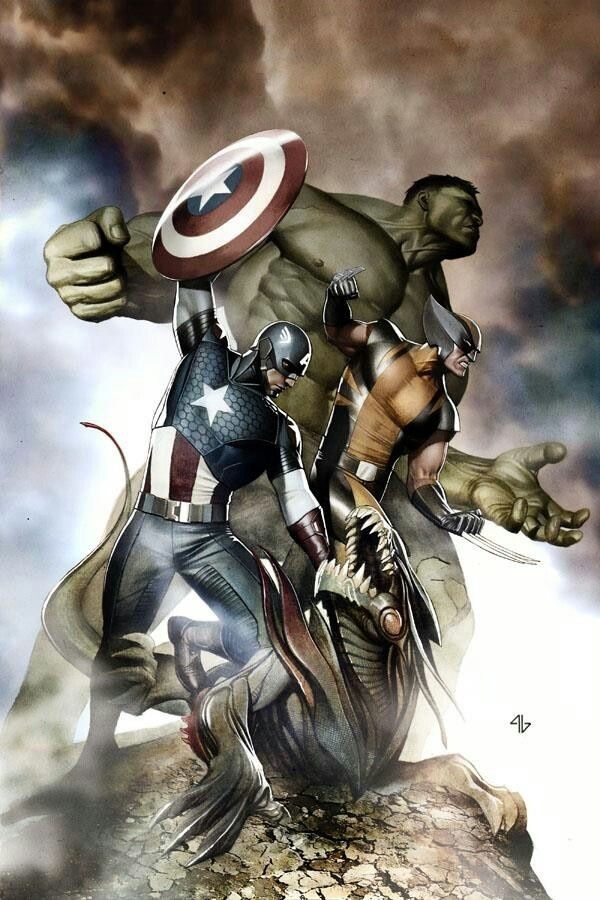
The Avengers show us that all kinds of Hero's can team up to save the world!

Avengers Team Work

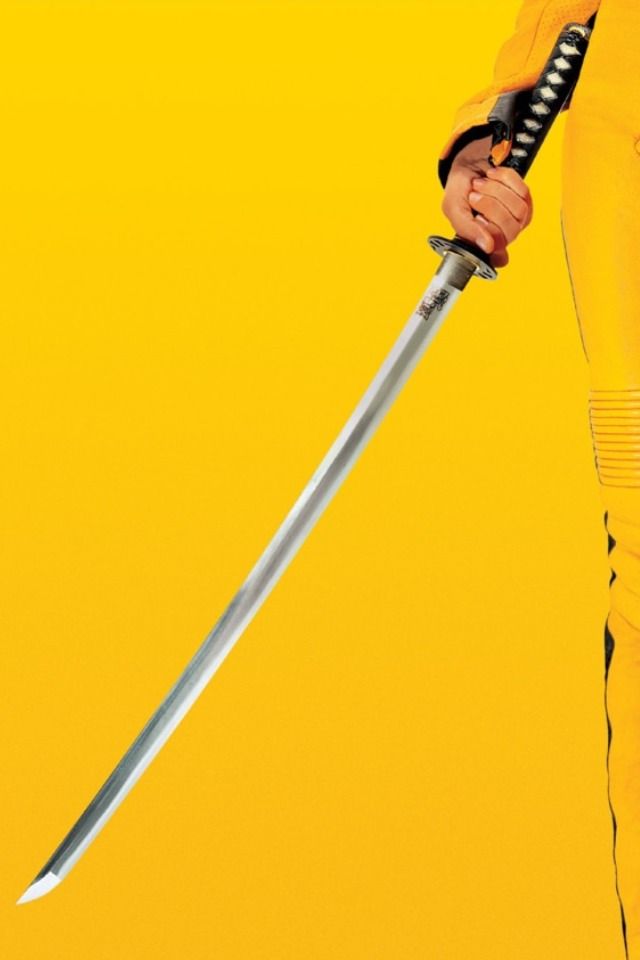
Uma Thurman taught us to not underestimate the capabilities of a hot woman with a vengeance!  By the way, if you would really like to own a sword like she had- head over to our sword page.

Kill Bill Sword

Speaking of Beautiful Women holding Swords.  I'd be ok with seeing more with that topic:

Well HELLO, Kate Beckensale.

Kate Beckensale Van Helsing Sword

Hey there Little Red! My My that is quite a big knife you have!

MyAnna Buring Witchville

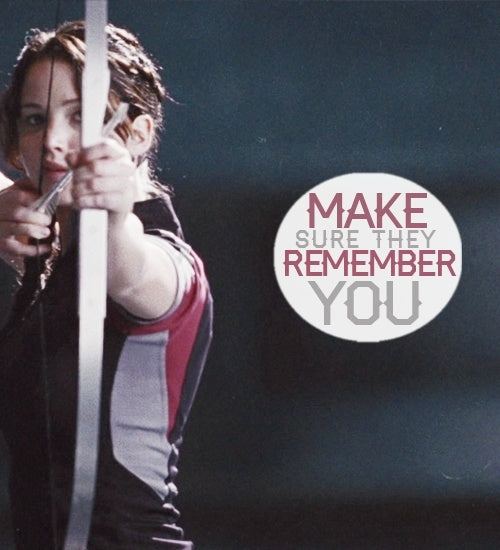
"Make sure they remember you."  Girls like Crossbows.

Katniss Bow Remember you quote


But more than that... they want to feel memorable. 

Of course we know it is the real HERO's who end up with the girl.  Just look out if her powers are greater than yours- right Cyclops?

Cyclops and Phoenix Xmen

If that doesn't scare you- I'm pretty sure that Super Girl is still available....

Super Girl Friend

So, you're saying I have a chance? ... 

Despicable me minion what

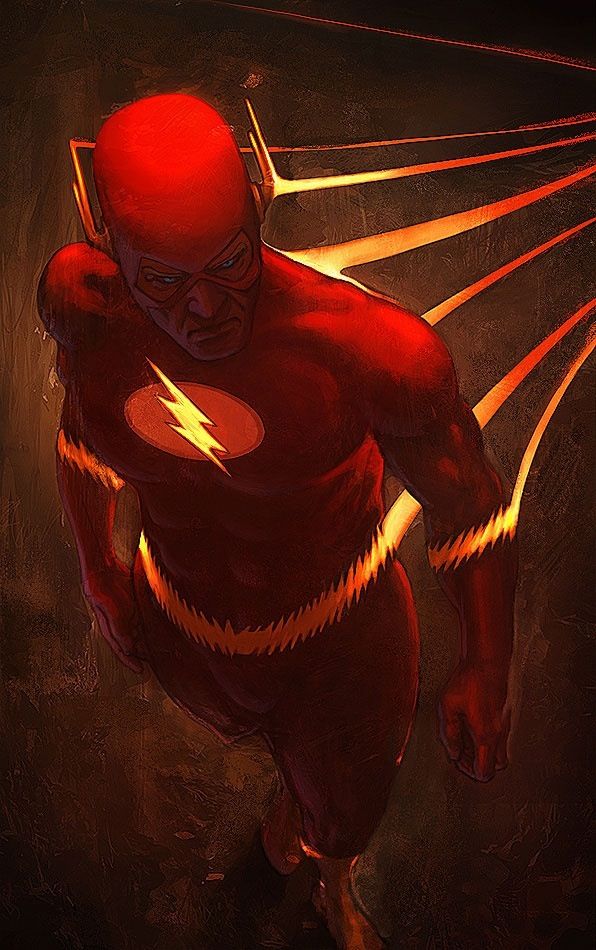
You better act fast though, if you want to marry a hot super hero... They are usually taken in a FLASH.

Flash DC Comics


So, How are you going to get her Godfather?  Make her an offer she cant refuse!

Godfather an offer you can't refuse

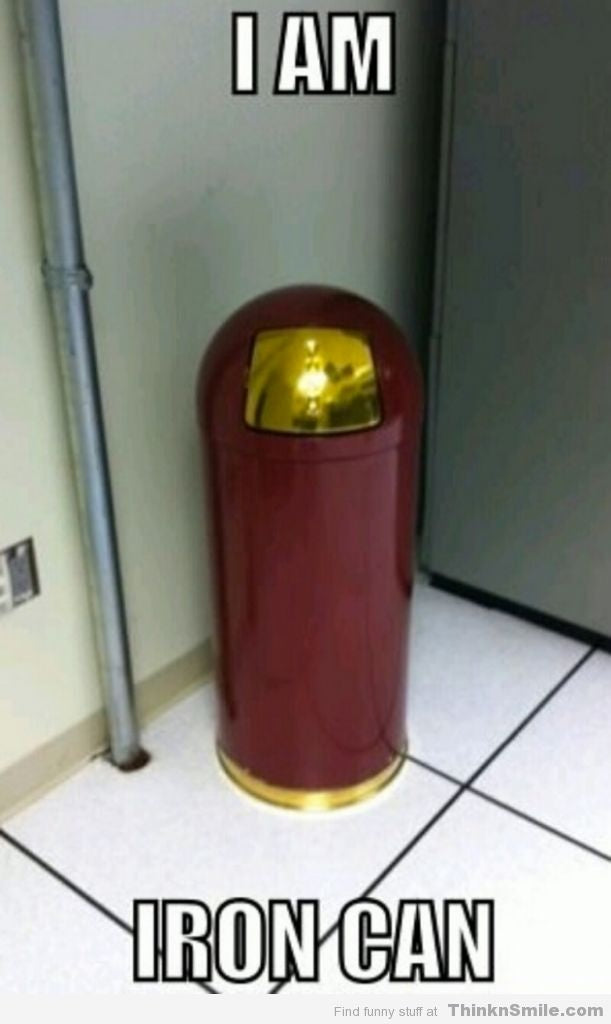
Don't worry- I've got this "covered."  I am - Iron Can. 

Iron Man I am Iron Can


Spiderman Spiderman - Does whatever Spiderman can...to get the girl in his web.

Spiderman Pose Picture


  If any man can get the girl, it's certainly Thor- what a great movie. Are you a Marvel Fan or do you prefer DC comics?

Thor Dark World Movie Poster

So, at the end of the day= the point is that Beautiful women who know how to kick butt are not easy to catch.  However, it does seem like the good guys get the girl.

Beautiful Superheros

Nicely done Sir.    

Any other tips on how to date a superhero?  What is she looking for? 

Posted by ES Team on 04 December, 2014 humor, movies | 0 comments | Read more →

2012 Backpack Update Three Weeks and Counting

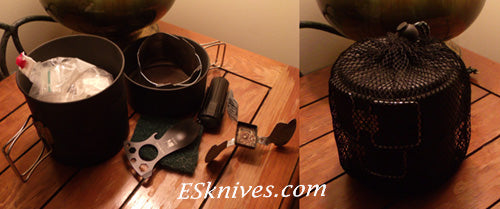
Camping Kitchen Packed

My Son and I spent the last three days getting all out gear and food together so we could pack our backpacks. That way when it is time to go all we have to do is pick up and go.

We are now down to three weeks and counting. Our leaving date is set for labor day weekend. Our destination is still up in the air. We know we are going to the Chattahoochee National Forest in North Georgia. We have decided on one of three trails. The trails of choice are the Benton Makaye, the Bartram or the Duncan Ridge. I have packed some of the Benton Makaye. The attraction to the Benton Makaye are on two levels: difficulty and isolation. We are looking for a challenge. The Benton Makaye has much less foot traffic than many of the other long distance trails. With that being said the Bartram and Duncan Ridge have things to offer. Before a decision is made more research is necessary.

Here is a picture of my kitchen. It starts with a titanium pot with a cup that acts as a lid. Everything that I cook with fits in the pot. My esbit stove and esbit fuel for 5 days fits in the pot. Also inside my kitchen is a columbia river spork tool, a scrubber and my blastmatch fire starter. I always bring a lighter because I like to eat. But I like to test my survival skills when I am out and that is where the blastmatch comes in. I bring tinder and I find tinder and I practice my fire starting skills. Back to my kitchen. Everything fits in the pot and the pot fits in a mesh bag. Everything weighs in at around a half a pound.

GORP Good Ole Raisins and PeanutsI wrote in an earlier post about my GORP (good ole raisin and peanuts). This is the recipe I used this time. It always changes.
Gorp:

  • raisins
  • Cranraisins blueberry juice
  • smoked almonds
  • roasted peanuts
  • banana hips
  • M & Ms
  • M & Ms peanut
  • coconuts 

    I like to use cashews but this trip they were cost prohibitive. I usually make a sweet and a spicy gorp but this year I am trying to keep costs at a minimum so we are taking sweet gorp. GORP is easy to make. You get your ingredients, mix them together and out the gorp in ziplocks. When I am on the trail I always have a small bag of gorp at hands reach whenever I want it.

    We also made some jerky in the dehydrator. Jerky is a great snack on the trail and a nice addition to lunch which is usually Gorp cheese and jerky. This is the recipe I put together.

    Jerky

    • brown sugar
    • dales sauce
    • Worcester sauce
    • adobo powder
    • ancho chili pepper powder
    • A few secret spices (a guy has to have a few secrets). 


    I like a semi sweet jerky that also has a little bite to it.

    Finished Packs for Hiking

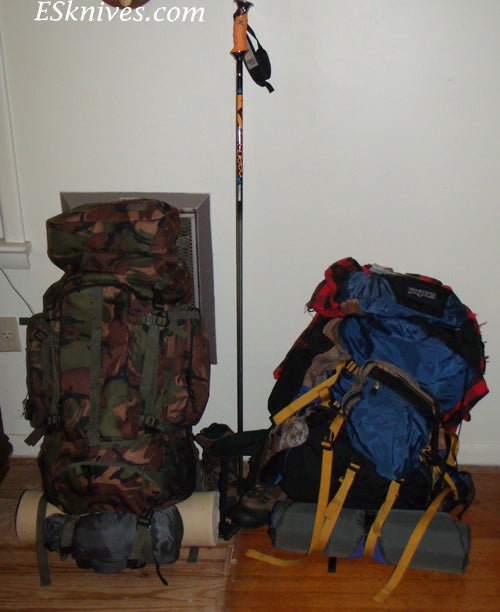
    Here are our packs ready to go.

    Future Backpacker

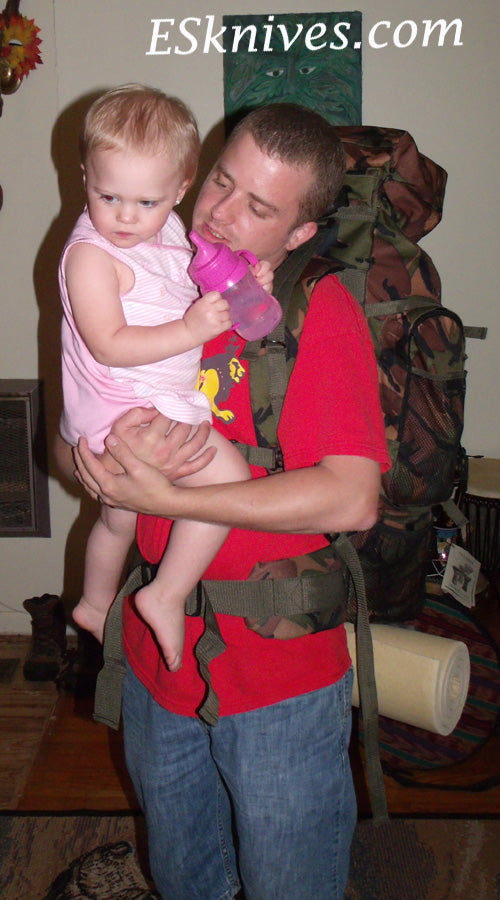
    My Granddaughter was in the mix and was sure her help was needed. She is my future backpacker. I started taking my son when he was around 8 years old.

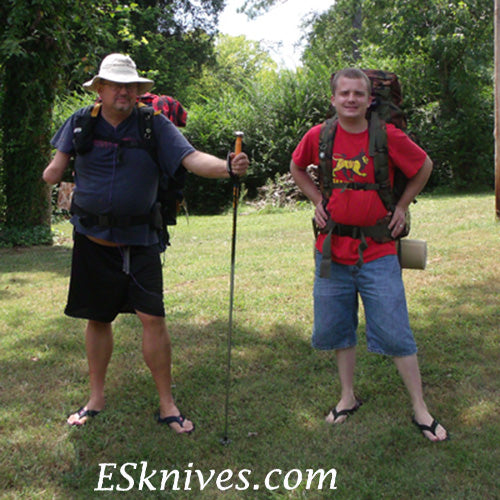
    Father Son Backpackers Ready to go

    Here we are in our packs. Waiting for September. You can see that "One Arm Don" is not just a nickname!

    That's all I have for now.

    One Arm Don
    Posted by ES Team on 03 December, 2014 ES family, get outdoors, hobbies | 0 comments | Read more →

    Austin in August - Batman

    Saturday in Austin. Today we made it to downtown Austin. We were lucky to happen across Bat Fest. We just happened by the Congress avenue bridge and there it was.... Bat Fest. Vendors, Food and 14 Bands paying their respect to the creatures of the night. Every night at dusk the bats leave their home under the bridge to forage for insects.
    Austin Bat Fest ESKnives

    We paid our $10 parking, the event was free, and we walked around checked out some street vendors, listened to some music and chilled out in Austin overlooking the Colorado River. We got to see the Dark Knight Bat Mobile. It was hard to get a picture with out people in around it. The Bat mobile seemed to be the most popular attraction.

    Bat mobile Austin Bat Fest

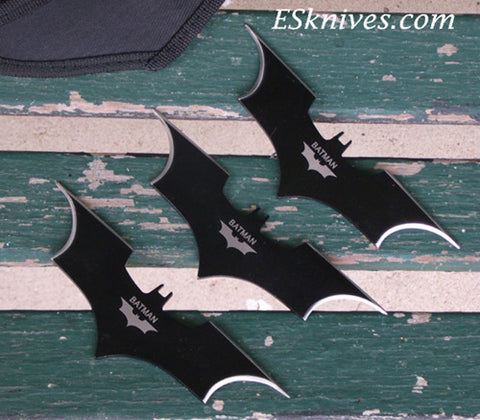
    Talking about Batman and such I thought this would be a good place to promote some product. A little advertising break. Here are our Batman throwing shurikens. I don't have to say anything about them. The picture speaks for itself. They're pretty cool!

    Batman Shurikens ESKnives

    Dark Knight Shurikens 

    We arrived at Bat Fest several hours before the main bat event. It was sunny and it was hot. All that walking we realized we were hungry and it was time to eat. We had a decision to make. Eat at Bat Fest or go down to 1st avenue and hit a street stand. After very little discussion the decision was unanimous: Time to leave Batfest and eat at Torchy's Tacos. It is hard to find a better Taco anywhere. Once Torchy's was brought up they won hands down. We headed down to the Trailer Park Eatery to land a few world famous tacos.

    Trailor Park and Eatery Austin Bat Fest

    Torchy's Tacos Austin, TX

    Torchy's is an Austin landmark. They have been around forever and as they say they have "Damn Good Tacos". Menu choices include the trailer park, the democrat and the dirty sanchez.

    Torchy's Tacos Austin Bat Fest

    We decided on the crossroads, the trailer park, the fried avavado and some street corn. All washed down with Topo Chico mineral water.

    A great dinner getting us ready for 6th street and some great music.

    That's all I have for now.

    One Arm Don


    Posted by ES Team on 02 December, 2014 ES family, hobbies | 0 comments | Read more →

    Knife history: Drawing Blood Lore

    Knife drawing blood lore

    Just as with swords, regional and cultural superstitions exist regarding the treatment of knives that are used in combat. One common superstition states that it is bad luck to return a combat knife from its sheath without using it to draw blood. A Scottish myth exists surrounding drawing the sgian dubh (Dirk), without drawing the blood of an Englishman. These superstitions are usually attempts to insult the culture of the enemy.

    There are cultures that believe a knife does not belong to an individual until it has 'bit' them, or tasted their blood. After initial blood letting the owner and the knife are bound in their destiny. Practitioner in these superstitions may intentionally prick their finger on the blade of a knife rather than wait for an accidental cut. The knife will stay sharp longer and is less likely to accidentally cut its owner once it has tasted his or her blood.

    This blood drawing has made it's way into our classic science fiction. Dune Writer Frank Herbert invented the Fremen and the Crysknife. Once a Fremen warrior unsheathed his blade it must draw blood before it is sheathed.

    Posted by ES Team on 01 December, 2014 history | 0 comments | Read more →
    « Previous 1 6 7 8 9 10 15 Next »

    Stay in touch

    Contact Us

    We'd love to hear from you. Call us at 1-256-486-3493 or send us a quick note from our contact us page and we'll be happy to answer any questions you have.

    Latest posts

    • Weekly Knife Giveaway - Claim your Entry

      We're giving away a knife every week through the end of April. Enter today and then bookmark this page to make it easy to claim your additional entries every week.  Read more →

    • Survival with Bandanas

      When I am out in the wild for more than a day I always think about survival. I only want to carry a certain amount of weight. When you are walking around in the wilderness weight is important. You only... Read more →